How to Measure and Set Conrod and Main Bearing Clearances for Optimal Engine Performance
How to Measure and Set Conrod and Main Bearing Clearances for Optimal Engine Performance
When it comes to building or rebuilding an engine, one of the most critical tasks is ensuring that all components are assembled with precise tolerances. Among these, setting the correct connecting rod (conrod) and main bearing clearances is essential to achieving optimal engine performance, longevity, and reliability. Improper clearances can lead to catastrophic engine failure or significantly reduced engine life. This guide will walk you through the steps to measure and set these clearances accurately. You can also take a look at this YouTube video for an indepth tutorial https://www.youtube.com/watch?v=WEuedVJJgIA
Why Bearing Clearances Matter
The conrod and main bearings are crucial in supporting the crankshaft and connecting rods, which are subject to extreme forces and rotations. These bearings operate within specific clearance ranges, allowing a thin film of oil to lubricate the moving parts. Too much clearance can result in lower oil pressure, leading to insufficient lubrication and increased wear. On the other hand, too little clearance can cause excessive friction, overheating, and ultimately, bearing failure.
Tools Required
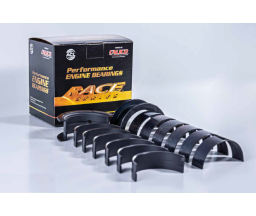
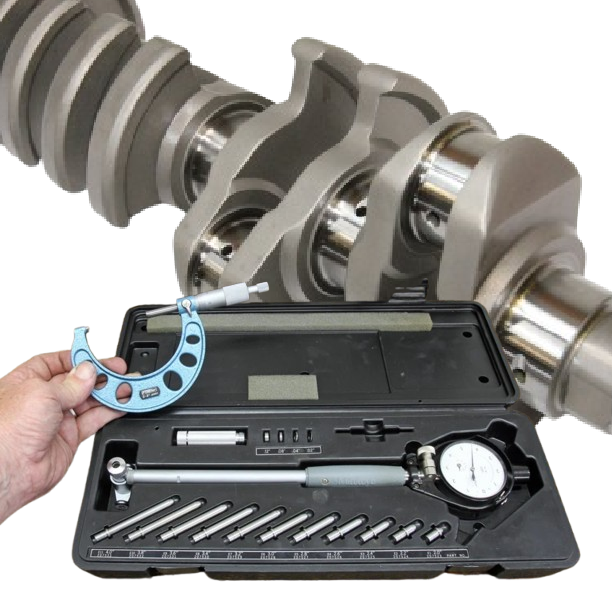
- Micrometer: For measuring journal diameters.
- Dial Bore Gauge: To measure the inside diameter of the bearing.
- Plastigage: A simple tool to double-check clearances.
- Torque Wrench: For correctly torquing down the bearing caps.
- Feeler Gauge: To verify the alignment of bearing caps.
- Clean Shop Rags: To keep everything clean.
- Assembly Lubricant: To protect the bearings during initial startup.
Step 1: Measure the Crankshaft Journals
Start by measuring the crankshaft's main and rod journals using a micrometer. It’s crucial to measure at multiple points along the journal to check for any out-of-round or taper conditions. Record the measurements accurately, as they will be used to determine the bearing clearances.
1. Clean the Journal Surfaces: Ensure that the journal surfaces are clean and free from any debris or oil.
2. Micrometer Setup: Place the micrometer over the journal and slowly rotate the spindle until it touches the journal surface.
3. Take Multiple Measurements: Measure the journal in several places—both horizontally and vertically—to check for roundness.
Step 2: Install Bearings and Measure Inside Diameter
Next, install the main and conrod bearings into their respective housings (block and conrod). Be sure to clean all surfaces thoroughly before installation to prevent debris from affecting the measurements.
1. Seat Bearings Properly: Carefully place the bearings into the block and conrods, ensuring they are seated correctly without any misalignment.
2. Torque Bearing Caps: Use a torque wrench to tighten the bearing caps to the manufacturer's specifications. This step is critical as incorrect torque can alter the bearing clearance.
3. Measure the Inside Diameter: Use a dial bore gauge to measure the inside diameter of the installed bearings. Record the measurements for comparison against the crankshaft journal measurements.
Step 3: Calculate Bearing Clearance
Subtract the crankshaft journal diameter from the bearing inside diameter to determine the bearing clearance.
- Example Calculation:
- Crankshaft journal diameter: 2.100 inches
- Bearing inside diameter: 2.104 inches
- Bearing clearance: 0.004 inches
Compare the calculated clearance with the manufacturer's specifications. Typically, clearance values for conrod bearings range between 0.0015 to 0.003 inches, while main bearings may require 0.002 to 0.003 inches of clearance.
Step 4: Double-Check with Plastigage
Plastigage is a simple but effective tool to verify your measurements. Place a small strip of Plastigage on the crankshaft journal, then carefully install the bearing cap and torque it to spec.
1. Place Plastigage: Lay a strip of Plastigage across the journal.
2. Torque the Cap: Tighten the cap to the manufacturer's torque specification.
3. Measure the Squash: Remove the cap and measure the width of the flattened Plastigage using the gauge on the Plastigage package. This will give you a direct measurement of the bearing clearance.
Step 5: Adjusting Clearances if Necessary
If the measured clearances are outside the manufacturer's recommended range, adjustments are necessary.
1. If Clearances Are Too Tight: Consider using slightly oversized bearings or polishing the crankshaft to increase clearance.
2. If Clearances Are Too Loose: You may need to switch to undersized bearings or have the crankshaft machined to a larger diameter.
Step 6: Final Assembly
Once you're confident that all clearances are within spec, apply assembly lubricant to the bearings to protect them during the initial startup. Reassemble the engine, ensuring all components are clean and properly torqued.
Conclusion
Measuring and setting conrod and main bearing clearances is a meticulous process, but it's essential for a reliable engine build. Taking the time to do it correctly ensures that your engine will perform well and last long. Precision is key, so double-check your work at every step and never rush through this critical process.
Happy building!